


2011 Toyota Avalon Std 80 Bit Key Remote Start Pictorial
Home /
the12volt's Install Bay /
Car Security and Convenience - Alarm/Remote Start Pictorials / 2011 Toyota Avalon Std 80 Bit Key Remote Start Pictorial ( Topic Closed)


Posted: March 11, 2012 at 4:19 PM / IP Logged
 At Driver's Fusebox
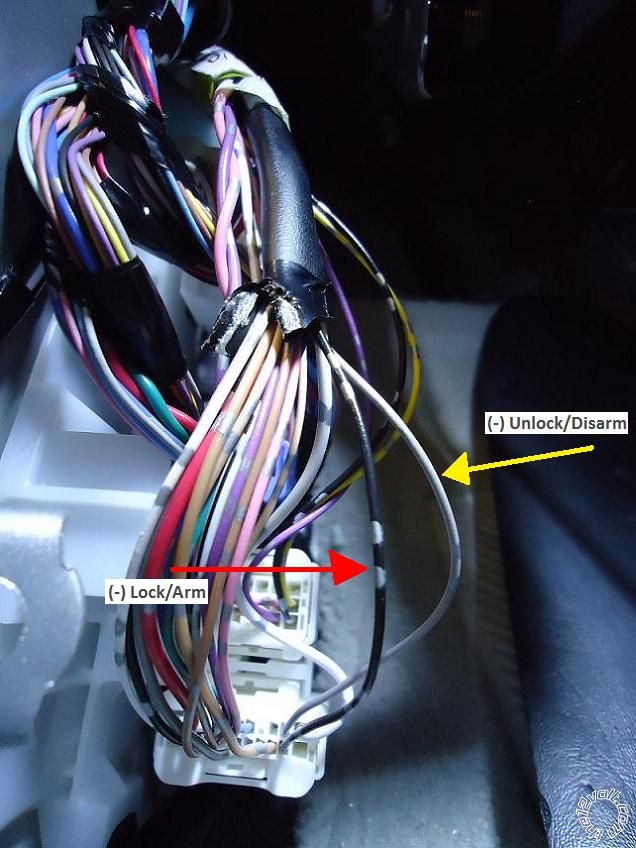
 Lock/Arm and Unlock/Disarm in bottom plug of driver's kick panel. For unlock/disarm, a single pulse will unlock the drivers door and disarm the factory alarm (if equipped) and a double pulse will unlock all the doors.
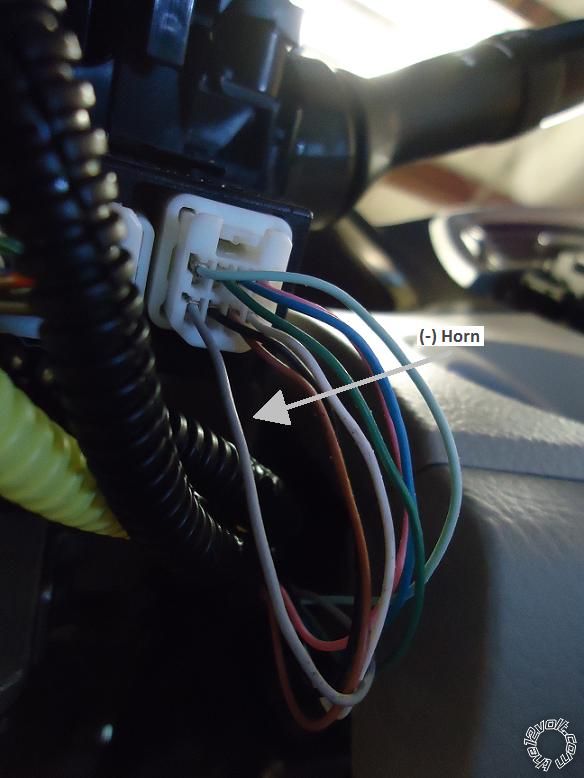
 Located at the plug connected at the horn switch
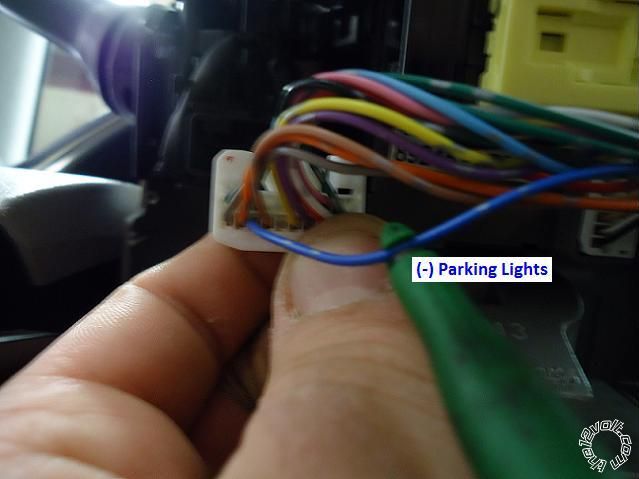
 Located at the Parking Light switch (In close proximity of the horn wire).
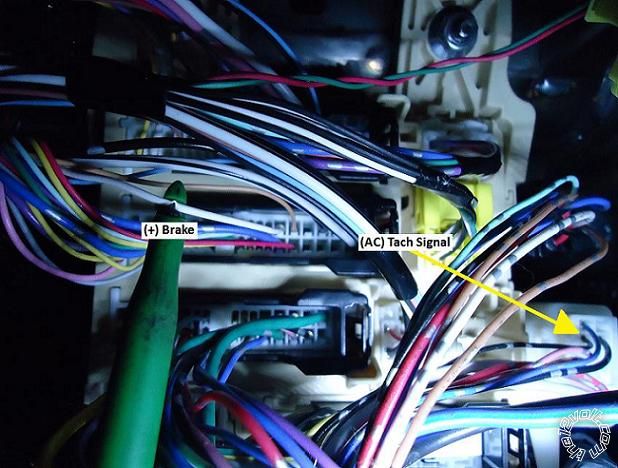
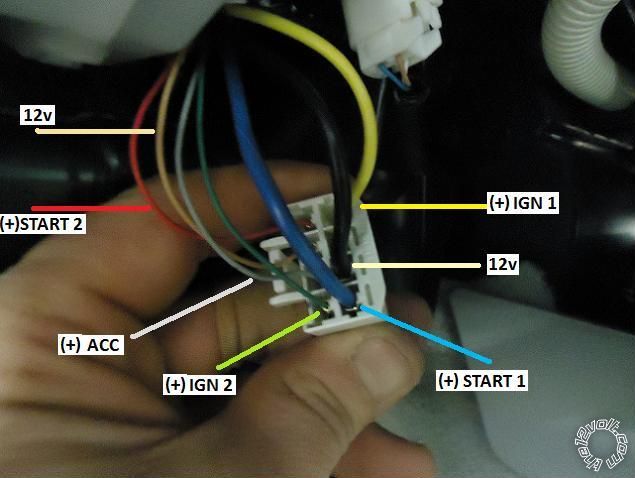
 Easily accessible at the Ignition Harness.
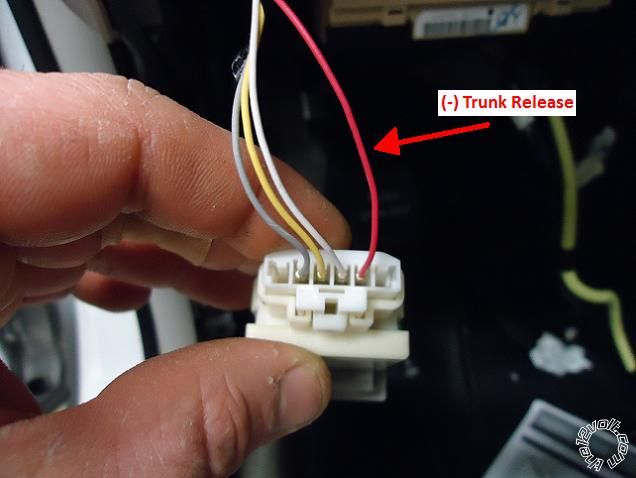
 Located at the trunk switch which is located to the left side of the knee bolster.
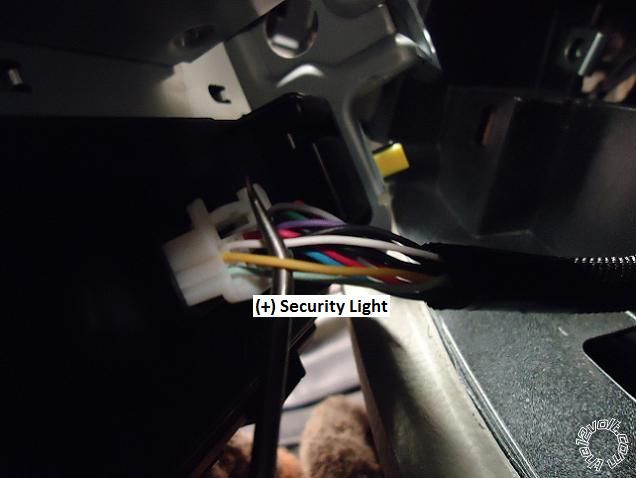
 Bypass wires located behind the glove box high in the passenger kick panel. Required for the ADS-TB Immobilizer bypass. I had to perform this procedure with the bypass, even to it programmed perfectly, to get the vehicle to start.
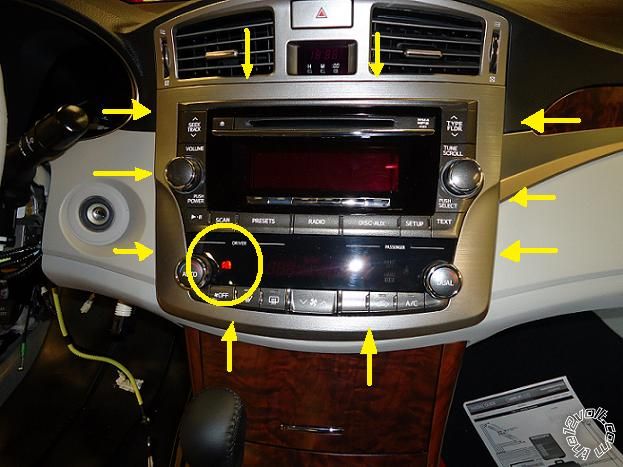
 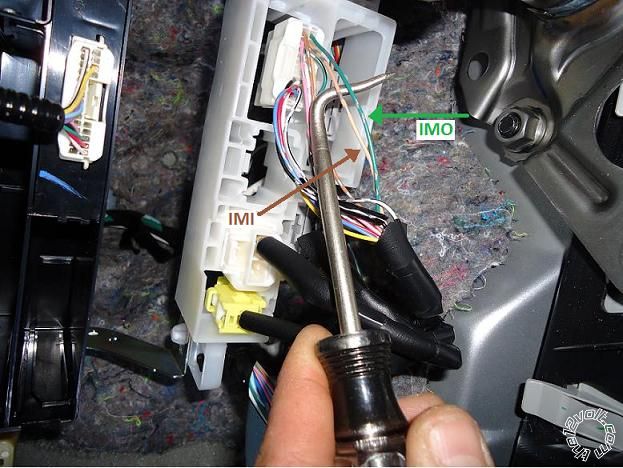 How to access the security wire. (10) Clips will remove the trim around the radio. I find it easiest and the most dash friendly to using my non-marring pry tool to remove the trim. (Not required with the Fortin EVO ALL)
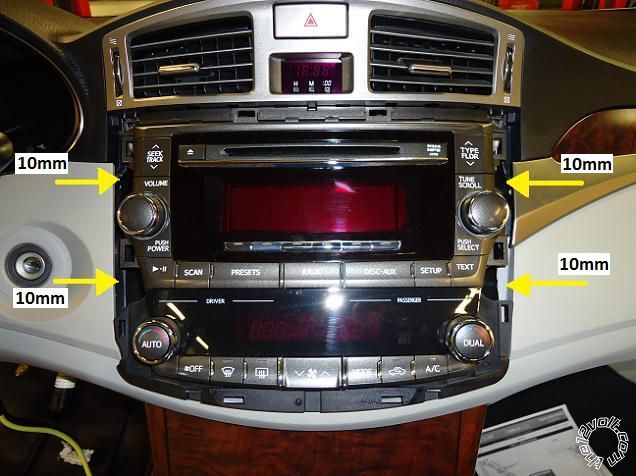
 Magnetic 10mm socket a must for removing/installing this radio (Not required with the Fortin EVO ALL).
 Located in the only harness plugged into the back of the climate controls (Not required with the Fortin EVO ALL).
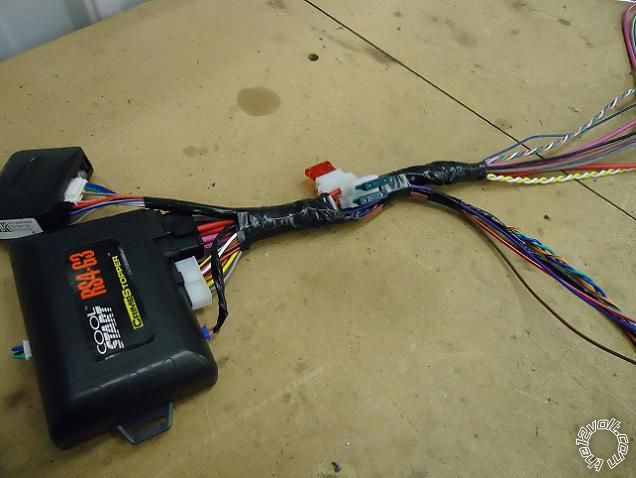
 This is a pretty simple vehicle (1-1.5hr). Since it's only a year old and I was bored, I figured I would give a pictoral post a shot. I would have used the EVO ALL but my boss has some vendetta against Fortin so we only carry ADS Modules. I don't no why he has a vendetta against Fortin, but it would save us tons of time not tying into the security light since we do all the Toyota Dealer's remote starts in town.


Posted: March 11, 2012 at 5:44 PM / IP Logged
Posted: March 11, 2012 at 9:01 PM / IP Logged
Posted: March 11, 2012 at 9:18 PM / IP Logged

Posted: March 12, 2012 at 2:47 PM / IP Logged

Posted: March 13, 2012 at 1:32 PM / IP Logged
Posted: March 13, 2012 at 10:12 PM / IP Logged
Posted: March 14, 2012 at 1:01 AM / IP Logged

Posted: October 25, 2012 at 11:20 AM / IP Logged
Posted: October 31, 2012 at 11:53 AM / IP Logged
 Printable version
| You cannot post new topics in this forum You cannot reply to topics in this forum You cannot delete your posts in this forum You cannot edit your posts in this forum You cannot create polls in this forum You cannot vote in polls in this forum |

| Search the12volt.com |
Follow the12volt.com 
Thursday, May 7, 2026 • Copyright © 1999-2026 the12volt.com, All Rights Reserved • Privacy Policy & Use of Cookies

Thursday, May 7, 2026 • Copyright © 1999-2026 the12volt.com, All Rights Reserved • Privacy Policy & Use of Cookies
Disclaimer:
*All information on this site ( the12volt.com ) is provided "as is" without any warranty of any kind, either expressed or implied, including but not limited to fitness for a particular use. Any user assumes the entire risk as to the accuracy and use of this information. Please
verify all wire colors and diagrams before applying any information.
