the12volt.com spacer
icon

97 accord ex 2 stage door unlock


Post ReplyPost New Topic
< Prev Topic Next Topic >
t&t tech 
Platinum - Posts: 2,608
Platinum spacespace
Joined: October 05, 2008
Location: Trinidad and Tobago
Posted: December 17, 2008 at 5:15 PM / IP Logged  
i was mistaken about the relay part and groundin pin 87, my bad,
commit your way to jehovah and he will act in your behalf. psalms 37:5
smorton 
Member - Posts: 9
Member spacespace
Joined: December 12, 2008
Location: Arizona, United States
Posted: December 17, 2008 at 8:17 PM / IP Logged  

No problem.  Don't worry about it.

I got the door locks working! I was worried about cutting another wire just to check it, so I spent some time figuring out how to take just one wire out of those connectors. Once I figured this out, I pulled out the Yellow/Red wire going to the door actuator (the connector with the 5 wires) and Bingo! The driver's door actuator did not work when all the others did. I used this wire (going to the actuator) and soldered everything up to the relay.  Thank you for your help in getting this figured out. This has been a great learning experience and makes me appreciate what you do, even more.  Now on to wire the trunk release.

Here's some pics:

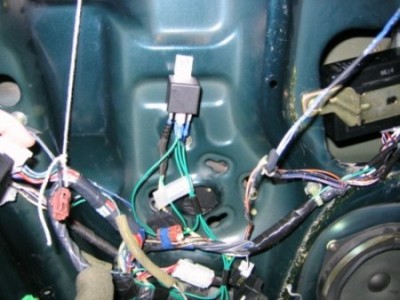
Yellow/Red wire soldered to extension that goes to relay pin 30.

97 accord ex 2 stage door unlock - Page 3 - Last Post -- posted image.

Relay location.

97 accord ex 2 stage door unlock - Page 3 - Last Post -- posted image.

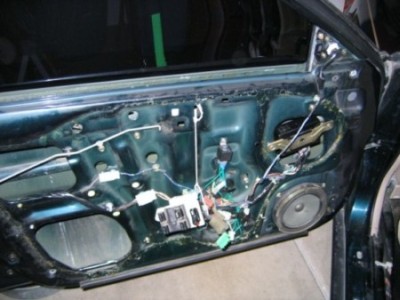
Driver's door with finished connections.

97 accord ex 2 stage door unlock - Page 3 - Last Post -- posted image.

Sorry the pics are not that great and the 50K file size forum limit doesn't help. But I hope you get the general idea. Here the final relay connections.

86 = +12V (White wire at module)

87 = +12V (White wire at module)

85 = alarm (-) trigger (Blue wire from alarm)

87A = Yellow/Red (cut at door connector that leads AWAY from the actuator)

30 =  Yellow/Red (cut at door connector that leads TO the actuator)

I have the plastic removed from the door because the next step, after I get the alarm finished, is to do some soundproofing.

Thank you again!

Scott

Page of 3

Sorry, you can NOT post a reply.
This topic is closed.

  Printable version Printable version Post ReplyPost New Topic
You cannot post new topics in this forum
You cannot reply to topics in this forum
You cannot delete your posts in this forum
You cannot edit your posts in this forum
You cannot create polls in this forum
You cannot vote in polls in this forum

  •  
Search the12volt.com
Follow the12volt.com Follow the12volt.com on Facebook
Monday, May 20, 2024 • Copyright © 1999-2024 the12volt.com, All Rights Reserved Privacy Policy & Use of Cookies
Disclaimer: *All information on this site ( the12volt.com ) is provided "as is" without any warranty of any kind, either expressed or implied, including but not limited to fitness for a particular use. Any user assumes the entire risk as to the accuracy and use of this information. Please verify all wire colors and diagrams before applying any information.

Secured by Sectigo
the12volt.com spacer
Support the12volt.com
Top
the12volt.com spacer