the12volt.com spacer
icon

Focal Beryllium BMW


Post ReplyPost New Topic
< Prev Topic Next Topic >
i am an idiot 
Platinum - Posts: 13,667
Platinum spaceThis member consistently provides reliable informationspace
Joined: September 21, 2006
Location: Louisiana, United States
Posted: November 02, 2009 at 6:24 AM / IP Logged Link to Post Post Reply Quote i am an idiot

Glad to see you made it back, Melted.

robolop 
Copper - Posts: 157
Copper spacespace
Joined: October 26, 2008
Posted: November 05, 2009 at 5:57 AM / IP Logged Link to Post Post Reply Quote robolop

 I forgot to post these pictures. They’re about the plexi sides who will get next to the amplifier.

These are also sprayed in the silver of the car.

Focal Beryllium BMW - Page 9 -- posted image.

Focal Beryllium BMW - Page 9 -- posted image.

For the amplifier-part, everything is mounted into the car. I’m going to wait some more before posting pictures.

Sorry dude’s.
In the meanwhile, I didn’t sat still. For about 10 years, I have something in my head, that I HAVE TO try sometime.
Well, now that stage1 is complete (and it all works perfectly), it’s time to do so. Here and there there are some things I need to improve, but part from that, stage 1 is finished.
So now the search is on for some nice and functional ways to work out the next stage… and surely, were going to add a little motor somewhere again J
I show my plans to some dudes, but they didn’t understand that good lol
I think that’s cool.......
Melted Fabric 
Silver - Posts: 509
Silver spacespace
Joined: October 24, 2003
Location: California, United States
Posted: November 05, 2009 at 8:14 PM / IP Logged Link to Post Post Reply Quote Melted Fabric
Keep them coming, you do extreme work and have shown very nice techniques for accomplishing unique designs.
I have gathered much from this project.
I have not failed. I've just found 10,000 ways that won't work.
When you do not know what you are doing and what you are doing is the best -- that is inspiration.
robolop 
Copper - Posts: 157
Copper spacespace
Joined: October 26, 2008
Posted: November 09, 2009 at 3:10 AM / IP Logged Link to Post Post Reply Quote robolop

Here some pictures of the thing I made.

First of all I made 6 of the same plexiglass boomerangs.

I did this in plexi so you can see if something goes wrong.

Made the model in MDF offcourse, then I pasted the 6 pieces on , and held it to the copy-mill

Focal Beryllium BMW - Page 9 -- posted image.

Focal Beryllium BMW - Page 9 -- posted image.

Only this is how you get everything 100% the same.

Focal Beryllium BMW - Page 9 -- posted image.

After that I milled the MDF rings.

Focal Beryllium BMW - Page 9 -- posted image.

De linkse ring is van volkern.

Focal Beryllium BMW - Page 9 -- posted image.

 Some more rings, and the plexi

Focal Beryllium BMW - Page 9 -- posted image.

Focal Beryllium BMW - Page 9 -- posted image.

This needs to be put together now, and then it’s finished.

Simple !

This “thing” I made, has a name… and I’m curious for the guy/girl who can guess what it’s called.

The first person may come over here to clean and dust my garage.

Franco90 
Copper - Posts: 48
Copper spacespace
Joined: February 23, 2004
Location: United States
Posted: November 13, 2009 at 2:55 AM / IP Logged Link to Post Post Reply Quote Franco90
wow nice build
squires500 
Member - Posts: 47
Member spacespace
Joined: June 21, 2008
Location: Australia
Posted: November 14, 2009 at 9:30 PM / IP Logged Link to Post Post Reply Quote squires500
im assuming you will make some form of diaphragm with the Plexiglas pieces sliding together and apart for to allow noise in and out???
robolop 
Copper - Posts: 157
Copper spacespace
Joined: October 26, 2008
Posted: January 10, 2010 at 10:07 AM / IP Logged Link to Post Post Reply Quote robolop

A couple of words about the DIAFRAGMA. First I would like to say that I didn’t know how this was called too…

As I told before, I had it in my mind to make such a thing for years now. I never bothered to think how this was going to work exactly…this was al about mathematiques, and even in school I hated that crap.

But if you look at it know, it’s quite simple.

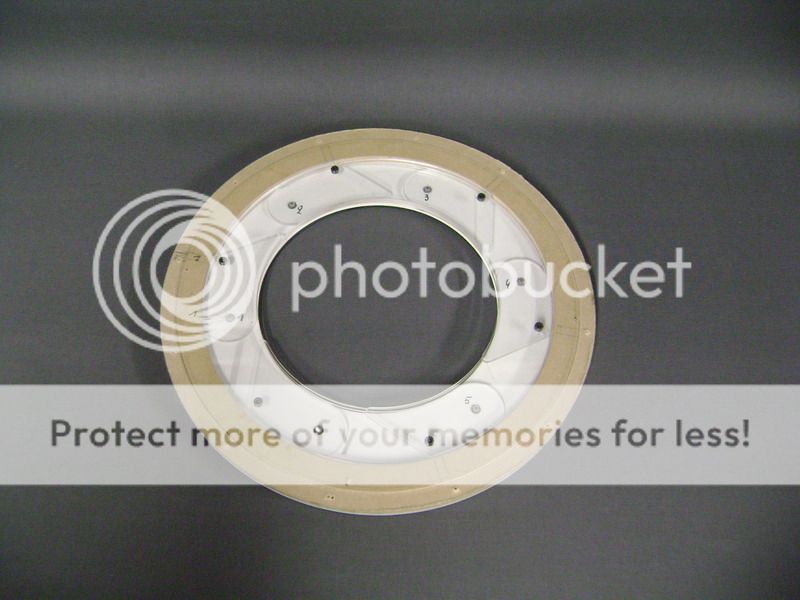
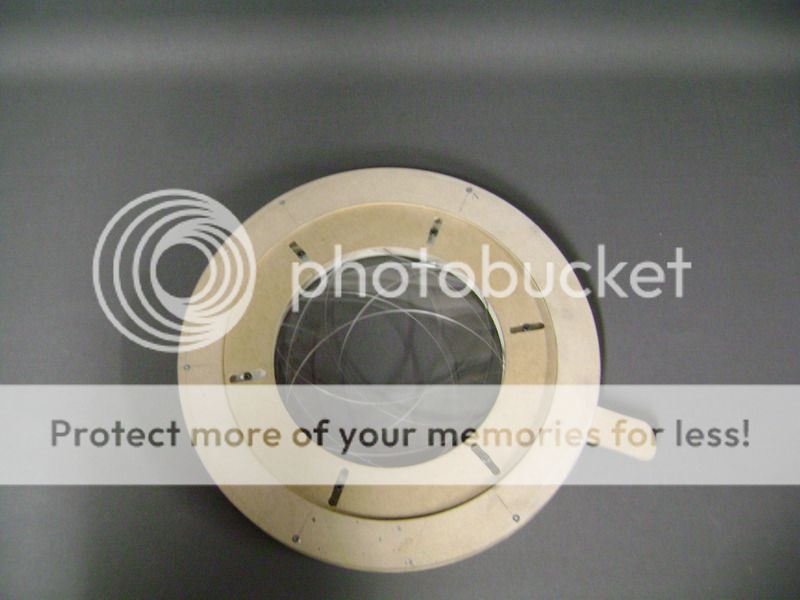
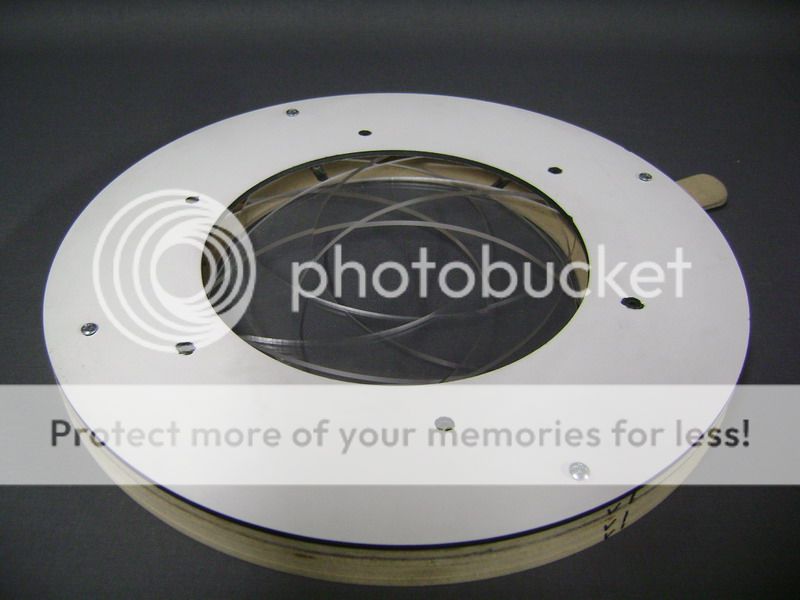
To explain it a bit easier, I let the top part off.

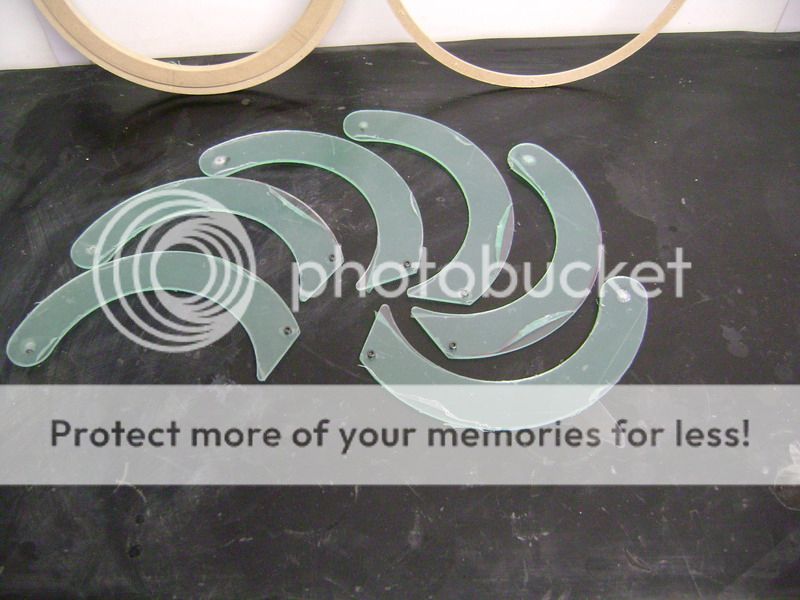
You can see 6 plexi boomerangs laying on top of each other. You can also see that on the tips there are some inbus-scews of M4, these are the hinge-points.

Focal Beryllium BMW - Page 9 -- posted image.

Focal Beryllium BMW - Page 9 -- posted image.

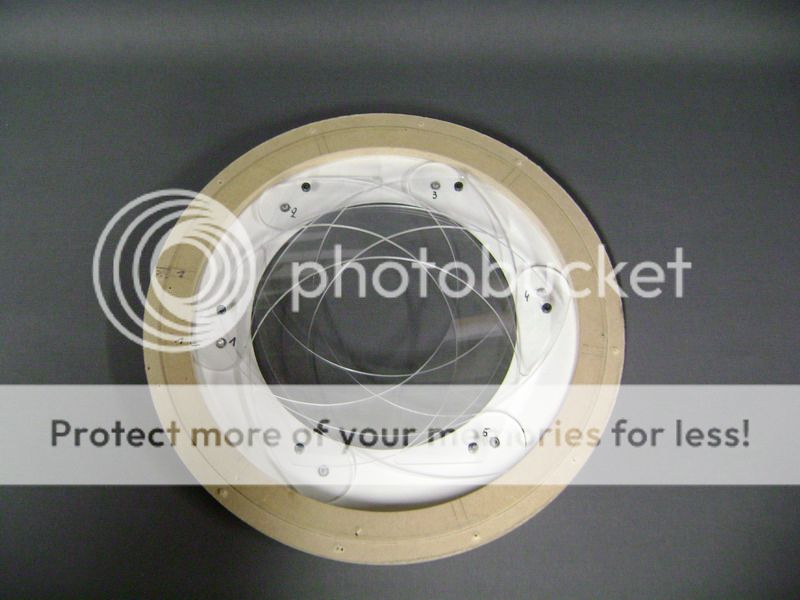
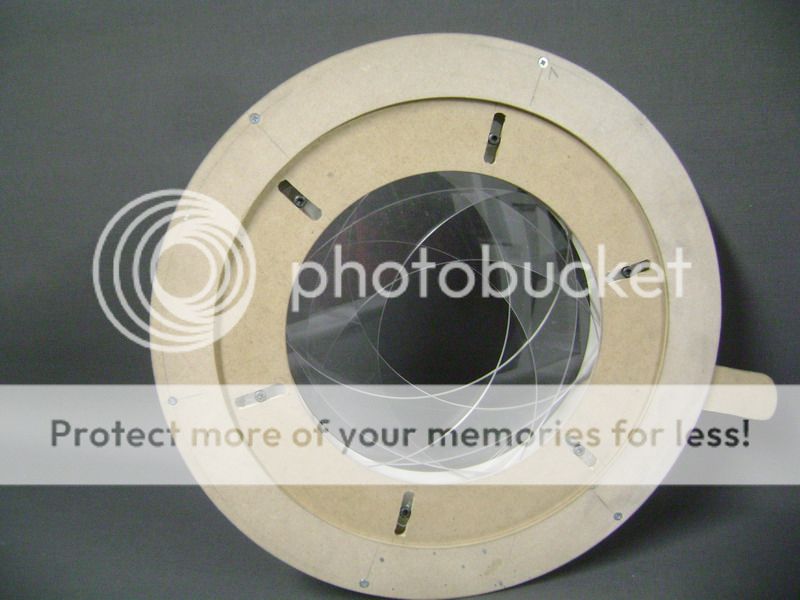
Here you can see him closed.

Focal Beryllium BMW - Page 9 -- posted image.

Focal Beryllium BMW - Page 9 -- posted image.

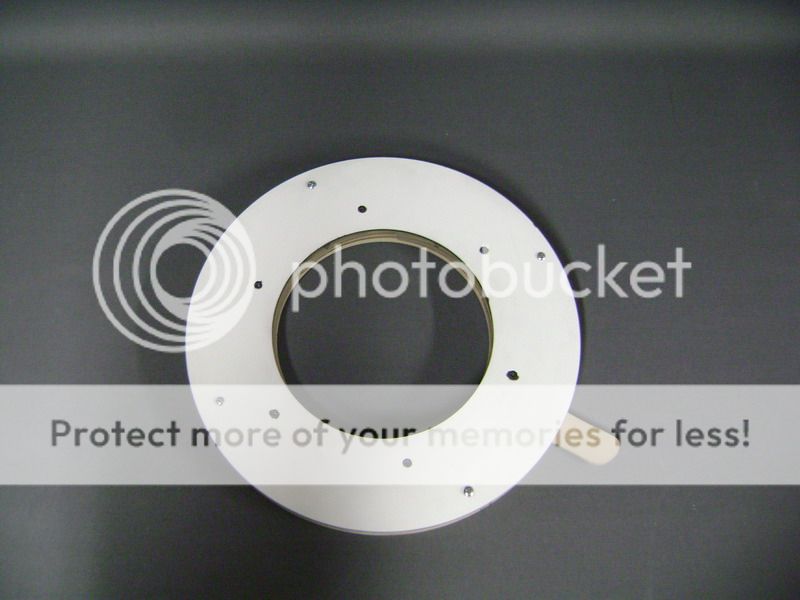
Here complete, with the cover on top.
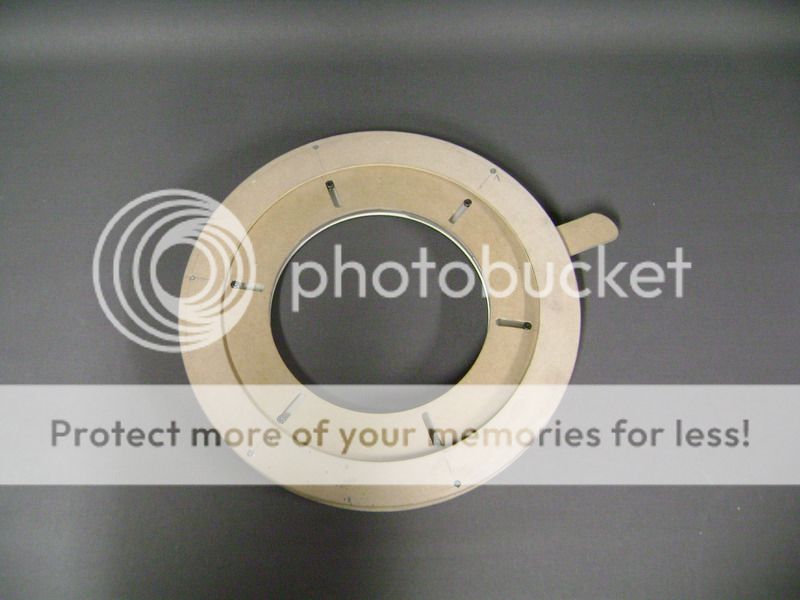
This is the slide, where you open and close this thing with.

Focal Beryllium BMW - Page 9 -- posted image.

In the 6 slots there are imbus-screws. You can also see these are on the outside of the slot.

Focal Beryllium BMW - Page 9 -- posted image.

Now you see it close, and you see the screws go to the middle.

Focal Beryllium BMW - Page 9 -- posted image.

Now it’s closed.

Focal Beryllium BMW - Page 9 -- posted image.

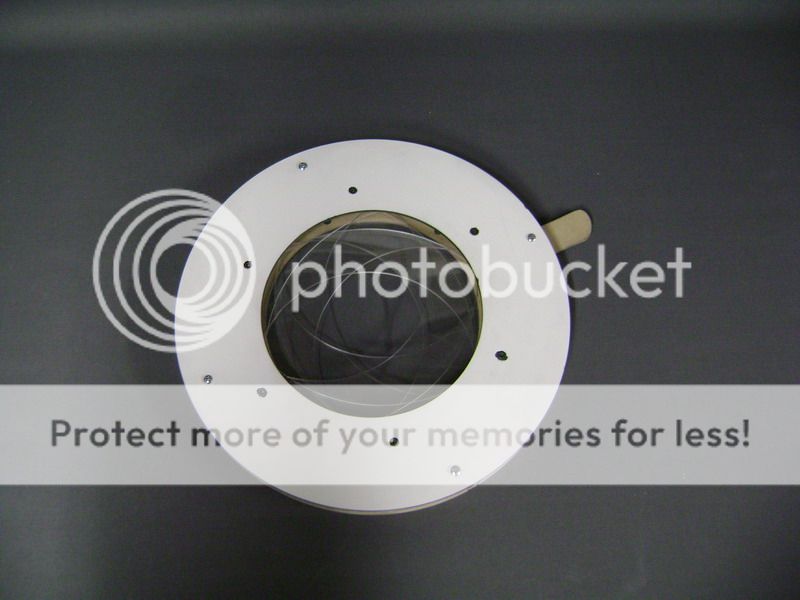
You can see there is a hole in the middle, but that’s normal with this drawing. It never closes completely.

Focal Beryllium BMW - Page 9 -- posted image.

Focal Beryllium BMW - Page 9 -- posted image.

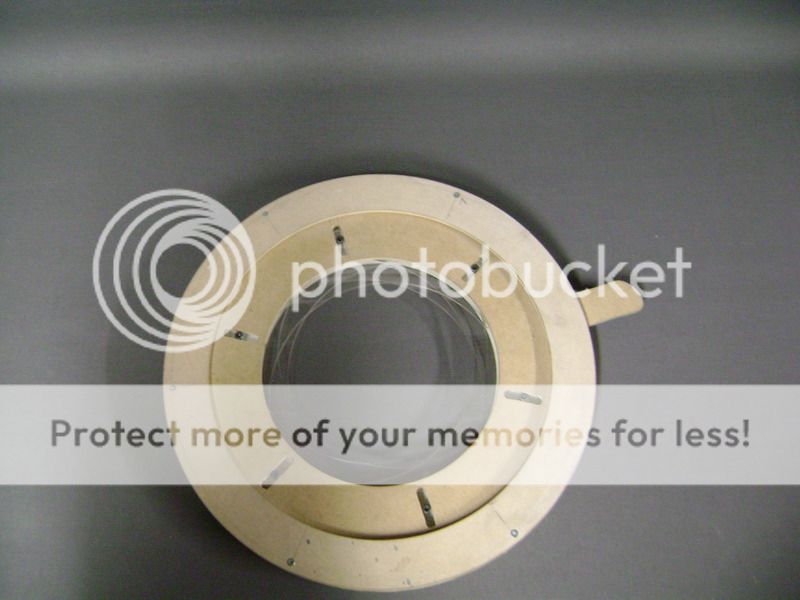
Some pictures from on the other side.

Focal Beryllium BMW - Page 9 -- posted image.

Focal Beryllium BMW - Page 9 -- posted image.

Focal Beryllium BMW - Page 9 -- posted image.

The meaning of this thing is, that I want it to stand behind the back of the rear seat. You may know that, in the beginning, I traded the normal rear seat for a rear seat with ski-hatch, to get the bass better into the interior.

Because I found this hole kind of BORING, I’m trying to put in a diafragma. Read again: TRYING !!

You also know the amplifier comes before that when it’s open, so I need to check and measure if I still have enough place to put it all.

I’m going to make everything out of other materials, about 18mm thick…

It also needs to open and close automatically, but that’s easy to sort out. The biggest problem is to ensure it doesn’t rattle while driving, but I may have a solution for that problem too…

Now about the hole (when everything is close up)… I think I’ve found a cool solution for that too.

I’m only hoping for one thing now… that I have enough place for this all…

robolop 
Copper - Posts: 157
Copper spacespace
Joined: October 26, 2008
Posted: January 10, 2010 at 10:17 AM / IP Logged Link to Post Post Reply Quote robolop

THX DUDE

robolop 
Copper - Posts: 157
Copper spacespace
Joined: October 26, 2008
Posted: January 10, 2010 at 10:19 AM / IP Logged Link to Post Post Reply Quote robolop

These will be the final boomerangs for the diaphragm. I used anodized aluminum of 1.5mm thick.

This material is also used on the backside of the Focal Woofers.

I taped 6 plates on each other, and held it to the copy-mill. The uppermill is now the best tool to fnish these things off… hope the disc doens’t go in to tears now .

Focal Beryllium BMW - Page 9 -- posted image.

Focal Beryllium BMW - Page 9 -- posted image.

Focal Beryllium BMW - Page 9 -- posted image.

Here you can see the upperside of the boomerangs.

Focal Beryllium BMW - Page 9 -- posted image.

Focal Beryllium BMW - Page 9 -- posted image.

And this is how the backside looks. You’ll see right-away that I taped some self-adhesive black vilt on it.

Focal Beryllium BMW - Page 9 -- posted image.

 I had to do this, so I couldn’t get any scratches on the aluminum when everything opens and closes.

Secondly this will prevent vibrating when I’m banging the install.

Cause the aluminum is only 1.5mm thick, I screwed in some screws with a bit of loctite on it. That way I’m sure it won’t fall apart.

Focal Beryllium BMW - Page 9 -- posted image.

The plexi boomerangs I made at first, landed in the rubbish bin…but they always seem to come back. How is that possible ?

robolop 
Copper - Posts: 157
Copper spacespace
Joined: October 26, 2008
Posted: January 10, 2010 at 10:21 AM / IP Logged Link to Post Post Reply Quote robolop

In the meanwhile I finished the diaphragm. This is the aluminum plate of 4mm thick where it'll get on to.

With the 6 little pads that stick out on the side, I can tighten it completely.
Focal Beryllium BMW - Page 9 -- posted image.
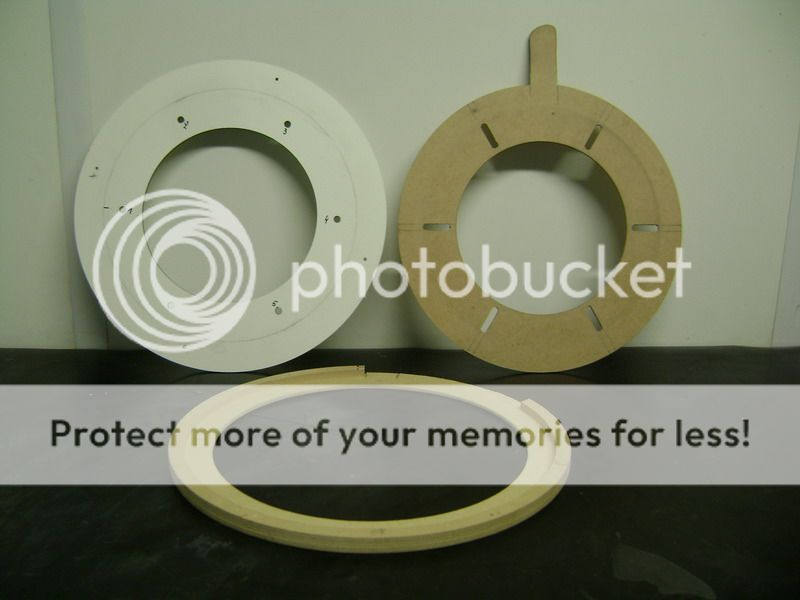
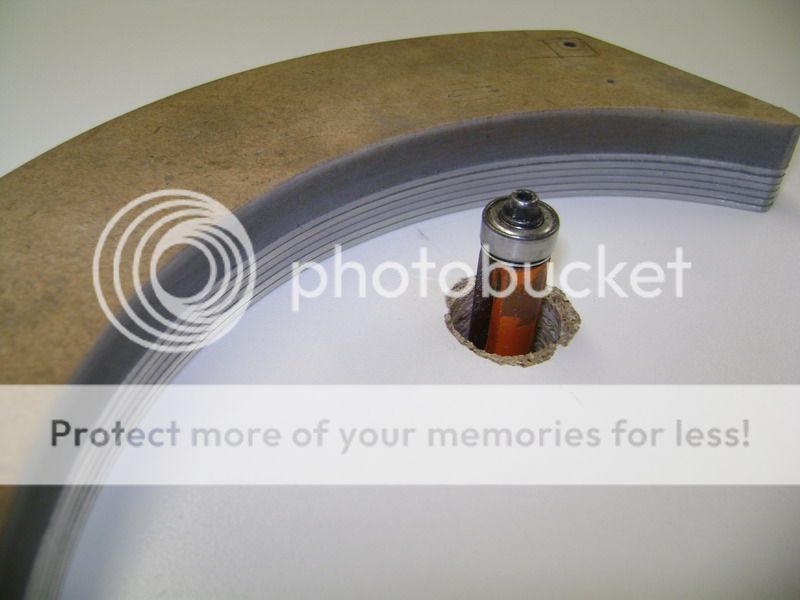
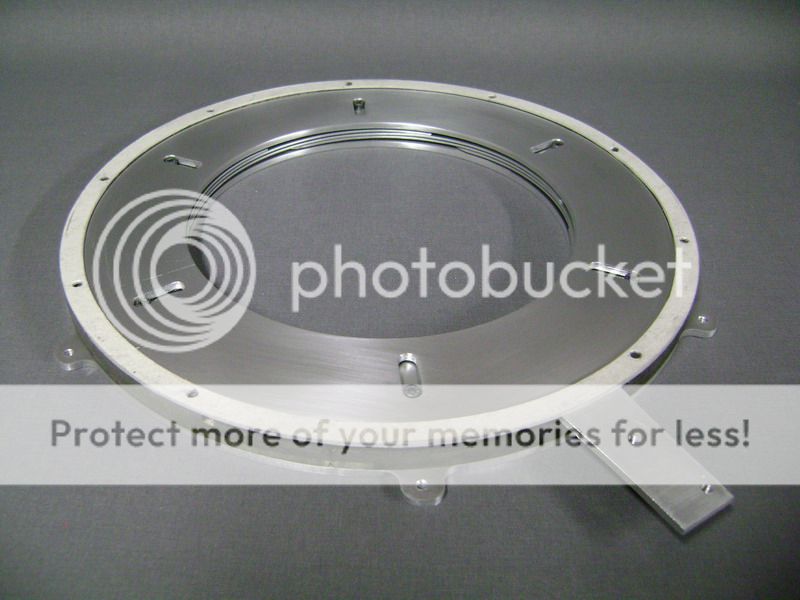
The black ring you can see here, is MDF I painted. The ring I used from the first diaphragm I made.

 Focal Beryllium BMW - Page 9 -- posted image.

This plate is also 4mm thick, and I put some more work into adjusting the slots where the screws will rest into.

 Focal Beryllium BMW - Page 9 -- posted image.

The piece on the right side, will serve for the transmittion. Later I can u on this,  what I like, and what's good.

You can also see I glued on a piece of vilt against the vibration.
Focal Beryllium BMW - Page 9 -- posted image.
Here you see the boomerangs sliding over eacht-other when it closes.

Focal Beryllium BMW - Page 9 -- posted image.

Focal Beryllium BMW - Page 9 -- posted image.

This is a cardboard ring of 2mm thick I cut out. Did this to catch the vibrations, and to adjust it all even better.

 Focal Beryllium BMW - Page 9 -- posted image.

Here the upper ring of 4mm is mounted on. On the bottom of this ring, I also glued some vilt.


Focal Beryllium BMW - Page 9 -- posted image.

Here in close position.

Focal Beryllium BMW - Page 9 -- posted image.

The anodised aluminum in the middle will look great in my opinion. Very satisfied I've chosen this material.


Focal Beryllium BMW - Page 9 -- posted image.

This is the backside.

Focal Beryllium BMW - Page 9 -- posted image.

Focal Beryllium BMW - Page 9 -- posted image.

 I must say this was easy for me to make.

The biggest problem was to make it tremble and vibration-free, and I did it.
When I open and close it all, you can feel the tention that's on it. I can adjust this delicately with the cardboard I used.
I screwed it all tight on a plate here on my table, and now I'm busy to adjust it subtle before adding the motor.

Page of 17

  Printable version Printable version Post ReplyPost New Topic
You cannot post new topics in this forum
You cannot reply to topics in this forum
You cannot delete your posts in this forum
You cannot edit your posts in this forum
You cannot create polls in this forum
You cannot vote in polls in this forum

  •  
Search the12volt.com
Follow the12volt.com Follow the12volt.com on Facebook
Friday, April 26, 2024 • Copyright © 1999-2024 the12volt.com, All Rights Reserved Privacy Policy & Use of Cookies
Disclaimer: *All information on this site ( the12volt.com ) is provided "as is" without any warranty of any kind, either expressed or implied, including but not limited to fitness for a particular use. Any user assumes the entire risk as to the accuracy and use of this information. Please verify all wire colors and diagrams before applying any information.

Secured by Sectigo
the12volt.com spacer
Support the12volt.com
Top
the12volt.com spacer