the12volt.com spacer
icon

Fiberglass Dash How To for my 83 Square B


Post ReplyPost New Topic
< Prev Topic Next Topic >
deeg money 
Copper - Posts: 107
Copper spacespace
Joined: October 26, 2008
Location: Florida, United States
Posted: August 25, 2009 at 7:52 AM / IP Logged  

Here are some new photo's. I am building the main dash piece that will house the headunit and my guages. I have also built a bottom piece since the bottom what a little crooked from cutting the mdf to get the dash from around the steering wheel. I have also decided that I am going to pull the steering wheel off and make a small hole in the dash for it.

Fiberglass Dash How To for my 83 Square B - Page 4 -- posted image.

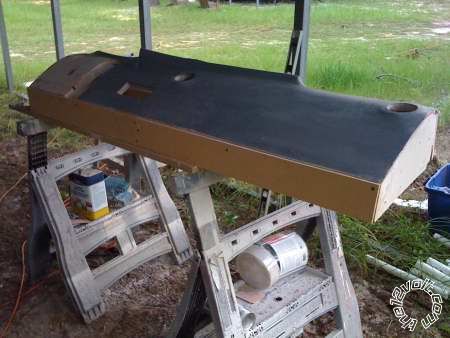
here is the 1/4 in mdf across the bottom. And no it is not ready for primer. I did that cuz my gf wanted to do it so I let her.

Fiberglass Dash How To for my 83 Square B - Page 4 -- posted image.

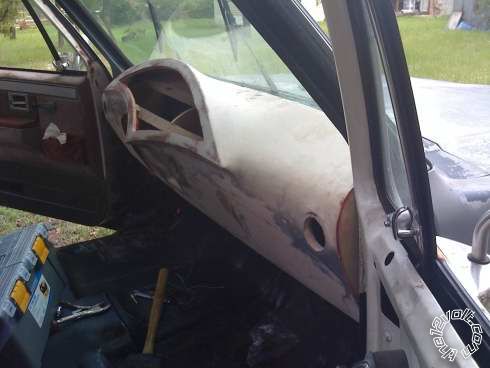
Here is another photo of the bottom piece with bondo on to make it flush with the rest of the dash. I also sanded most of the primer back down to do some touch up work.

Fiberglass Dash How To for my 83 Square B - Page 4 -- posted image.

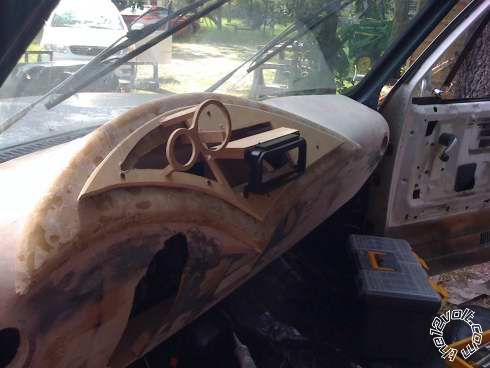
Here is the glassed piece that will house the HU and guages. I did used tin foil to lay it on. I pulled all of it off and then took the photo.

Fiberglass Dash How To for my 83 Square B - Page 4 -- posted image.

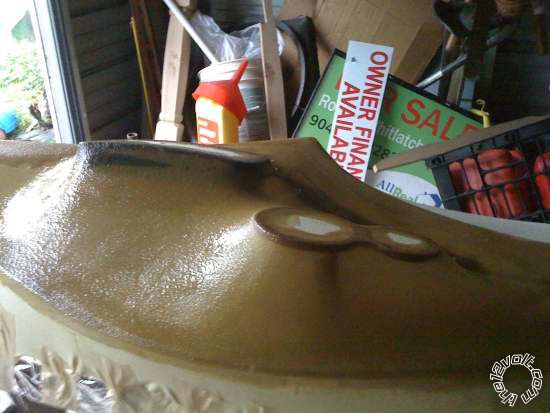
Another view of the glassed piece. this is 3 layers thick in glass and as of now it is 5 or 6 layers thick.

Fiberglass Dash How To for my 83 Square B - Page 4 -- posted image.

here it is hanging up just so you can get a better view of it. I will take more today if I go out to work on it. All in all it is coming together nicely I think. I have layed some flat fiberglass that is 4 or 5 layers thick to hold my ac vents in place since I used wood that was to thick to attach the vent too. I will take photo's of it so you can see what I am doing.

Deeg money
"If you cant be good, be good at it"
deeg money 
Copper - Posts: 107
Copper spacespace
Joined: October 26, 2008
Location: Florida, United States
Posted: August 25, 2009 at 1:04 PM / IP Logged  
ok so I figured that when I got the steering wheel off that everything else like the shift lever and the blinkers and all that good stuff would be pretty easy to get off.... well I was wrong. Does anyone have a clue or guide me through getting the rest of this off before I take a sawzall to it out of anger and frustration??? It an 1983 chevy c10 with tilt steering. Also do you know if the whole steering column has to come out or can does it come apart somewhere in the middle. I have no clue about this but I want my dash to be one piece without another piece under the column that attaches. Thanks and please help me so I can finish this up!!
Deeg money
"If you cant be good, be good at it"
deeg money 
Copper - Posts: 107
Copper spacespace
Joined: October 26, 2008
Location: Florida, United States
Posted: August 25, 2009 at 6:06 PM / IP Logged  
ok so after around 4 hours of fooling around with the damn thing I got most of the tilt steering mechanism off. Unfortunately I also had to tear apart some of the dash around the column area so I could re fiberglass it. There were two pieces of wood that were glassed in that were to close to the column and could not fit around it. So I had to beat them out and it tore out the glass too. No biggie tho. Thank got I have until feb before I even have to worry about the truck moving. Anyways I dont need the how to on the steering wheel nonetheless. Thank anyways
Deeg money
"If you cant be good, be good at it"
deeg money 
Copper - Posts: 107
Copper spacespace
Joined: October 26, 2008
Location: Florida, United States
Posted: August 31, 2009 at 6:20 PM / IP Logged  

I havent really had a lot of time to work on the dash lately. I have also ran into a few problems from leaving the dash laying on the saw horses. The top of the dash that originally meshed perfect with the windshield seal has bent upward and doesnt sit right anymore. I have also bent the bottom ofthe dash from the same thing. The wieght of the dash slowly but surely bends the glass and wood from being left outside or in a not ac environment. Anyways I have just been doing touch up work from the things I am learning about doing a dash from the first time. The second time building one will be much easier from all the mistakes I made this time. Anyways here are a few photo's

Fiberglass Dash How To for my 83 Square B - Page 4 -- posted image.

Fiberglass Dash How To for my 83 Square B - Page 4 -- posted image.

here is the dash piece that will house the fuel and speedo guage along with the headunit. I have cut as much of the wood off as possible to make it light and so it doenst come in contact withthe fleece. I have already wrapped it in fleece once to see how it woudl look. I have encountered a few spots where the wood hit and pushes up the fleece. Hopefully within the next few days I will glass it. Thanks

Deeg money
"If you cant be good, be good at it"
deeg money 
Copper - Posts: 107
Copper spacespace
Joined: October 26, 2008
Location: Florida, United States
Posted: September 01, 2009 at 7:17 PM / IP Logged  

I know this is in the wrong forum but more people look at this forum of mine than any other one I would post. I am wondering if anyone knows anything about the Fi H.Q. subs. I was thinking about getting a few 18's from them but would like to know how they actually respong and get a few opinions about it.

By the way I havent had time to work on the dash but hopefully tom it wont rain and I can glass the piece I have been working on. Oh and does anyone have a good way to get fiberglass to stick to plastic. I bought a dash kit from wally word for a buick since it had a nice rounded look and it was easier for me to buy a 12 kit than to make a perfect headunit holder. Thanks for the help in advance!!

Deeg money
"If you cant be good, be good at it"
deeg money 
Copper - Posts: 107
Copper spacespace
Joined: October 26, 2008
Location: Florida, United States
Posted: September 02, 2009 at 6:10 PM / IP Logged  

Here are some photo's of the guages and headunit glassed.

Fiberglass Dash How To for my 83 Square B - Page 4 -- posted image.

I went to jo ann's fabric today and found some really thin, very flexible, material similar to fleece. It worked great. Even though it is $14.99 a sq yd I am going to use it from now on. The fleece I used for the rest of the dash is pretty thick and I could barely get the resin to go through it. any ways here it is.

Fiberglass Dash How To for my 83 Square B - Page 4 -- posted image.

on this photo I could not get the material, We'll just call it fleece anyways, the fleece to contour right under the headunit, so I stapled it down to get it wher I can remold it with the next layer of glass. I put the rest of my resin that I had left over in the divets caused from the staple gun to help round it out. When its dry I am going to belt sand the staples down and then lay more glass over top to get the curves I want.

Fiberglass Dash How To for my 83 Square B - Page 4 -- posted image.

 Just another photo here. It was hard to get good pictures cuz Im using my phone and it was raining out so there was insufficient lighting. I'll have more up in the next few days.

Deeg money
"If you cant be good, be good at it"
deeg money 
Copper - Posts: 107
Copper spacespace
Joined: October 26, 2008
Location: Florida, United States
Posted: September 03, 2009 at 7:20 PM / IP Logged  

Fiberglass Dash How To for my 83 Square B - Page 4 -- posted image.

Fiberglass Dash How To for my 83 Square B - Page 4 -- posted image.

Fiberglass Dash How To for my 83 Square B - Page 4 -- posted image.

Fiberglass Dash How To for my 83 Square B - Page 4 -- posted image.

Ok so I have layed two extra layers of glass and plan to lay one more before applying bondo. As you can see I have covered up the staples that I used to make the curves under the guages and headunit. It actually looks much better than I thought. hopefully tom I can lay the last layer and then start the bondo and sanding. I also have a ton of work that needs to be finished up on the rest of the dash. Hopefully in the next week I can get it almost finished.

Deeg money
"If you cant be good, be good at it"
ianarian 
Copper - Posts: 516
Copper spacespace
Joined: April 24, 2009
Location: California, United States
Posted: September 04, 2009 at 9:16 AM / IP Logged  
Sup Deeg, been outta town for a while. No speakers in the dash huh? A couple of nice horns tweets in there assuming position might bring your sound to life. Are you gonna recess the gauges a little? Or fab a overhead visor above the deck?
This is what I do for FUN!
deeg money 
Copper - Posts: 107
Copper spacespace
Joined: October 26, 2008
Location: Florida, United States
Posted: September 04, 2009 at 9:54 AM / IP Logged  

The guages I have only stick out at most about an 1/8 of an inch so I wont recess them. They are classic looking guages with a crome ring around them that is curved. I think I posted pics of them somewhere on here. as for the headunit, you are way over my head talking about a an overhead visor for the deck. I have no clue what that means. Please explain in simpler terms!!!But is what I can tell you is that the headunit does recess into the piece I built. I have not cut them out all of the way since I still have to put one more layer of glass and some bondo. I used a headunit adapter to a buick so It would slide in and out with ease. Plus the aftermarket adapter has a nice rounded look to it. I drilled about 30 holes into the plastic to make sure the glass would hold to it.

I will take some more pics today of the next layer of glass and bondo work. Hopefully today I will be able to cut the rings out all the way and show you what I am talking about! Thanks for posting a comment!

Oh and if you are knowledgeable about where to put speakers in the dash at I might give it a shot. I have all the time in the world right now so I would def put some thought into it with the right idea. I have two pair of kenwood 6.5's for right now. Im not too worried about type of speakers yet I just need some music. but let me know where you think I should put them and I just might try it

Deeg money
"If you cant be good, be good at it"
deeg money 
Copper - Posts: 107
Copper spacespace
Joined: October 26, 2008
Location: Florida, United States
Posted: September 04, 2009 at 2:23 PM / IP Logged  

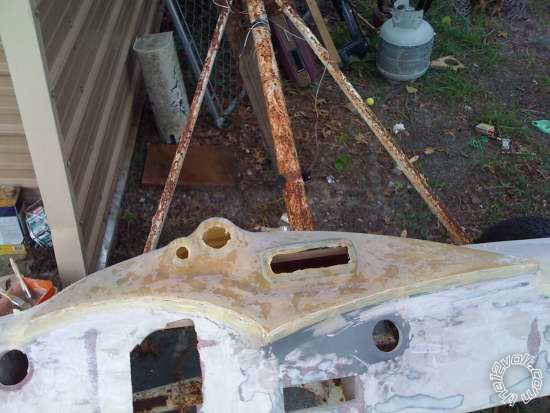
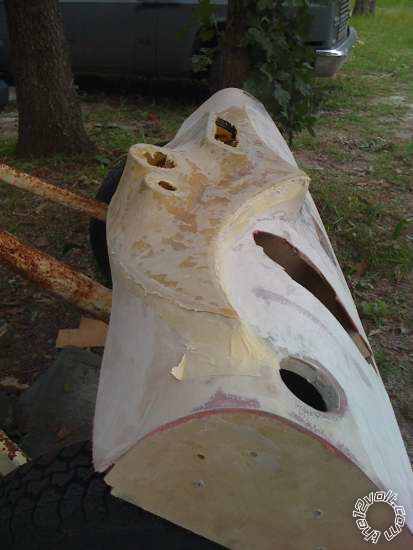
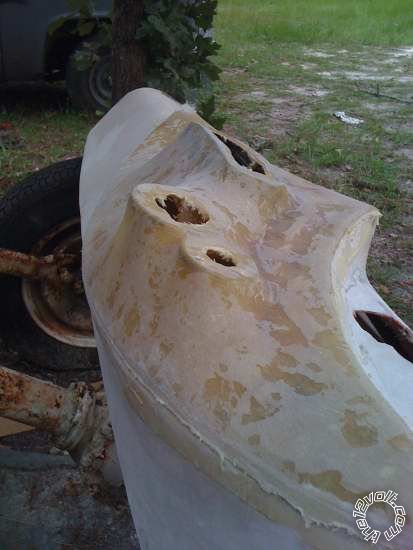
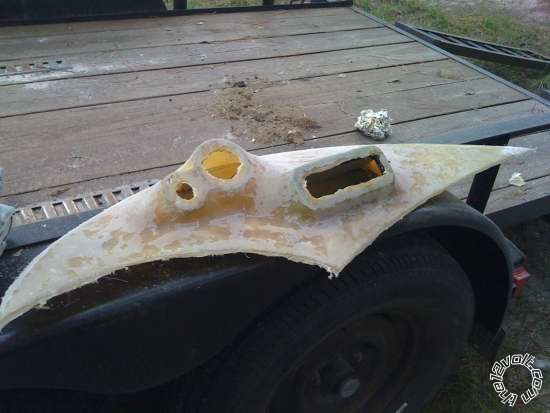
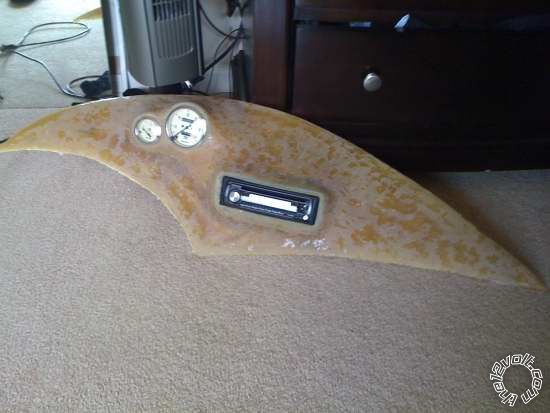
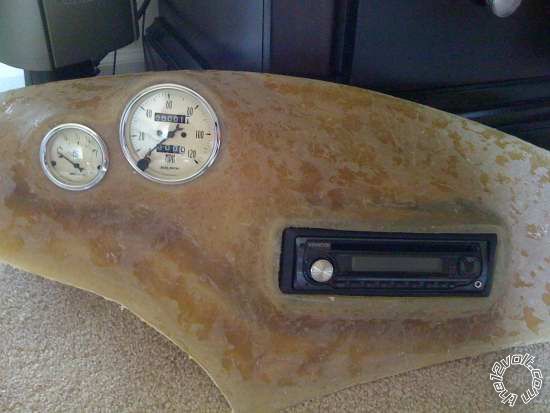
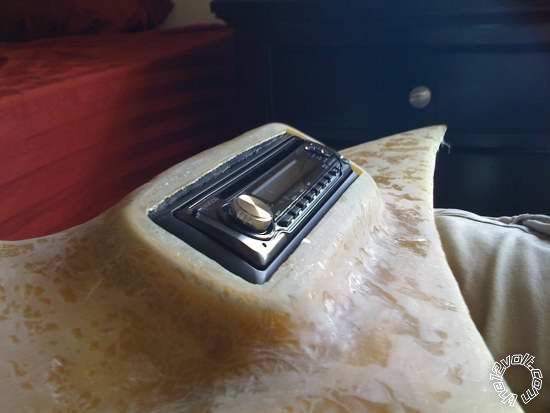
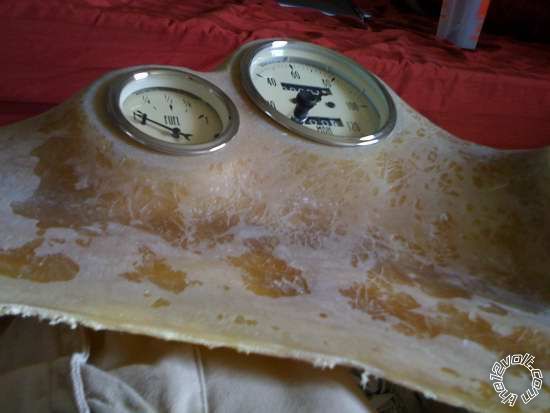
I glassed one more layer this morning around 11 went and mowed a yard and came back and sanded it down. I routed out the guages and headunit area and brought it home with me to take some photo's. now is all I really need to do is bondo and lots of sanding... for this piece atleast. I have a ton of work left on the rest of the dash!

Fiberglass Dash How To for my 83 Square B - Page 4 -- posted image.

Fiberglass Dash How To for my 83 Square B - Page 4 -- posted image.

Fiberglass Dash How To for my 83 Square B - Page 4 -- posted image.

Fiberglass Dash How To for my 83 Square B - Page 4 -- posted image.

well here is what I got done today. I think its looking pretty good and Im pretty happy with how it is looking.

Deeg money
"If you cant be good, be good at it"
Page of 7

  Printable version Printable version Post ReplyPost New Topic
You cannot post new topics in this forum
You cannot reply to topics in this forum
You cannot delete your posts in this forum
You cannot edit your posts in this forum
You cannot create polls in this forum
You cannot vote in polls in this forum

  •  
Search the12volt.com
Follow the12volt.com Follow the12volt.com on Facebook
Friday, April 26, 2024 • Copyright © 1999-2024 the12volt.com, All Rights Reserved Privacy Policy & Use of Cookies
Disclaimer: *All information on this site ( the12volt.com ) is provided "as is" without any warranty of any kind, either expressed or implied, including but not limited to fitness for a particular use. Any user assumes the entire risk as to the accuracy and use of this information. Please verify all wire colors and diagrams before applying any information.

Secured by Sectigo
the12volt.com spacer
Support the12volt.com
Top
the12volt.com spacer