Hey guys, I am new here. However, I have been on the forum for quite some time, just reading and learning, but never posting.
Nonetheless, my friend and I have been installing a sound system in my car. We opted for a simple custom job, and considering this, I thought that I would share the progress here, and look for opinions and any input. Feedback would be most helpful. By the way, sorry for the low quality pictures (only 1.3 MP), I was using a camera phone because I lost my digital camera.
After installing a new head unit, I purchased two 12 subwoofers and we got to work.
We opted for a standard MDF wood enclosure (a sealed box, by the way), but because we wanted a custom design (but nothing too fancy, of course), and to save money, we decided to build one ourselves.
For 20 dollars, I purchased a 4x8 sheet of ¾ MDF board from Lowes. Before constructing the enclosure, we first had to design a new floorboard for the trunk of my car. The previous floorboard was a thin, saggy cardboard cutout that sat on top of the spare tire. This looked tacky and it would not suffice.
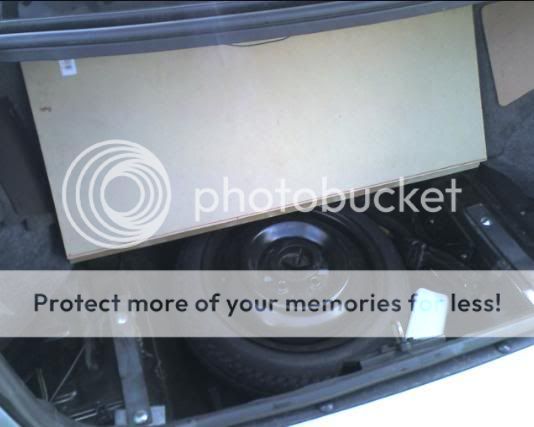
After measuring the necessary floor space, we cut out a large chunk of the MDF sheet and created a new floorboard. However, I wanted to retain the ability to reach my spare tire easily (one of my friends must first disconnect and remove his box before he can remove his spare tire, and I did not want the same difficulty). So I came up with a simple idea (I dont know if anyone else has thought of this) that would allow me to keep the enclosure secured, while being able to remove my spare tire - a door for the spare tire.
We cut the floorboard in half, and reconnected them with four small hinges two on each side. The hinges only cost a few bucks at Wal-Mart. This ended up working perfectly.

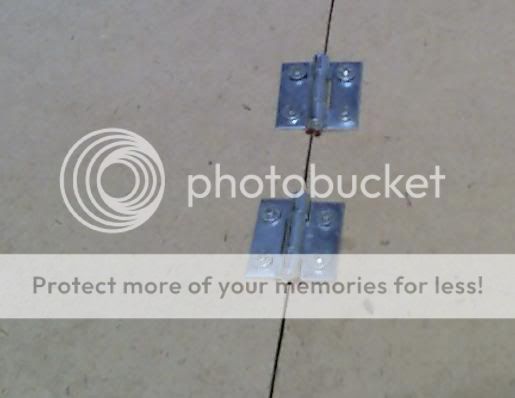
It is important to note that it was unnecessary to cut the length of the door over the entire tire well, so we just cut it over the majority of the tire. If necessary, the tire will easily come out at an angle.
Next, we started designing the subwoofer enclosure. We wanted the front side angled, so we just ran off a quick sketch and got to work. After measuring, we cut off three larger sections of the MDF board for the enclosure: front, back, top. The width of the box was decided by the shortest measured width inside the trunk (remember, it has to fit back there).
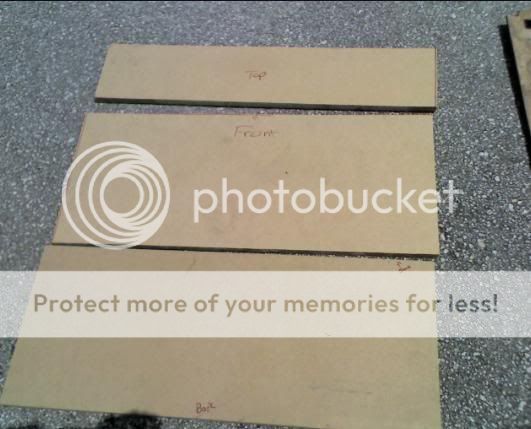
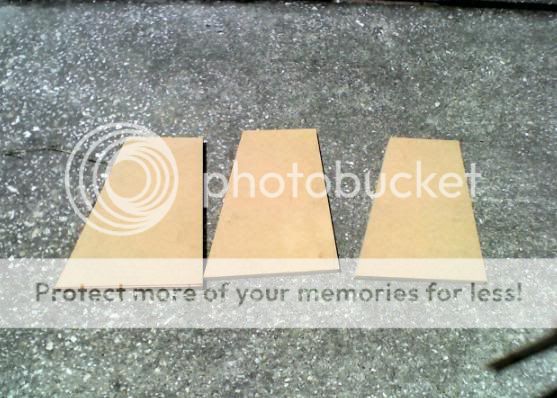
We then cut off three smaller sections and shaped them to the angle we wanted. Two of these would be used for the sides of the enclosure, while the third piece would be used to divide the enclosure into two chambers.
By the way, the floorboard would also serve as the bottom of the box. Our design called for everything to be screwed and mounted together. It will all be one piece.
We took the board that would serve as the front of the box, and we measured and traced out the area we needed to serve as the holes where we would mount the subs. A jigsaw served this purpose nicely. Pretty simple, just be careful not to make mistakes.

After this, I ran on down to Radio Shack and bought a speaker port for 5 dollars. After cutting out a small hole with a jigsaw, we mounted and sealed it to the back of the box.
I also recently installed my sound deafening material throughout my trunk. Dynomat, although excellent, is too expensive for my budget, so I opted for an alternative. After looking up some reviews about B-Quiet Extreme, I ordered 50 square feet of it. I found a 10% discount code online, and after shipping, it cost me about 86 dollars. Not to shabby, but lets hope it keeps the rattle down a little.
Before installing, I gutted the carpeting out of my trunk and vacuumed it clean. Then I used denatured alcohol (around six dollars at Lowes) and a microfiber cloth (Wal-Mart) to clean out my trunk completely. This will prepare a clean surface (so the adhesive will stick better) for the material before I line it.
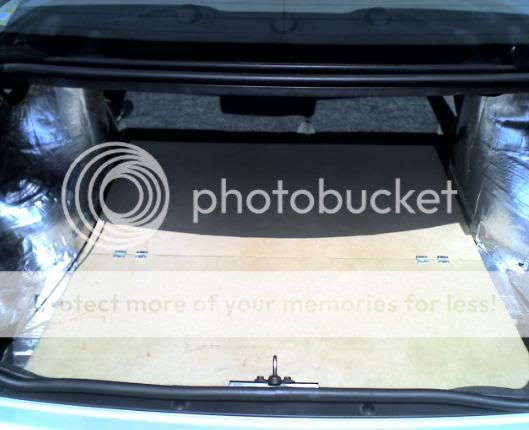
After a few days, I finished lining the inside of my trunk with the B-Quiet Extreme, and I think it turned out rather well. Lets just hope it works like it is suppose to.
https://i204.photobucket.com/albums/bb56/Stealthfade/11.jpg
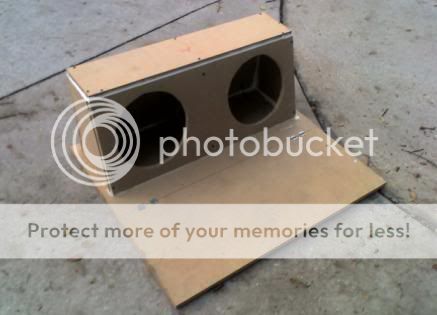
After this I got back to working on the enclosure. All we had left to do was to screw and seal the boards together, and mount it to the floorboard. The sealant was pretty cheap (Wal-Mart).
Note that we had to mount the box several inches from the end of the floorboard to keep it away from the slope of the seats (the back wall/seats is not a perfect vertical line). After the box was finished, we mounted it to the floorboard and set it in my trunk. Note that this picture was taken before we screwed the top piece on.
https://i204.photobucket.com/albums/bb56/Stealthfade/16.jpg
https://i204.photobucket.com/albums/bb56/Stealthfade/5.jpg
Now I am waiting to order my amp, and then I need to get creative to incorporate it into my current design. After this, we will carpet the project, and install the subwoofers, and Streetglow lighting. We still have a lot of work to do, but this is where I am stopping to post.
If you have any opinions, comments, ideas, or any other feedback, please feel free to drop a line. I need ideas for my amp, maybe something with Plexiglas?


 16 -
16 - 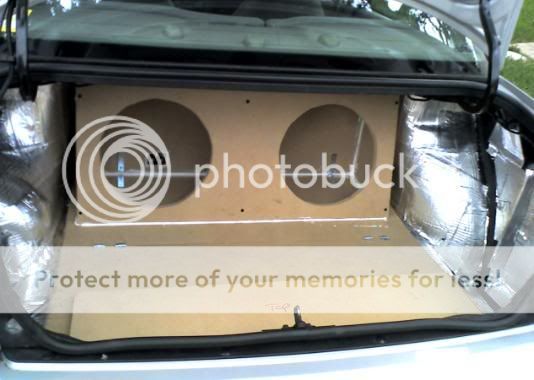 5 -
5 - 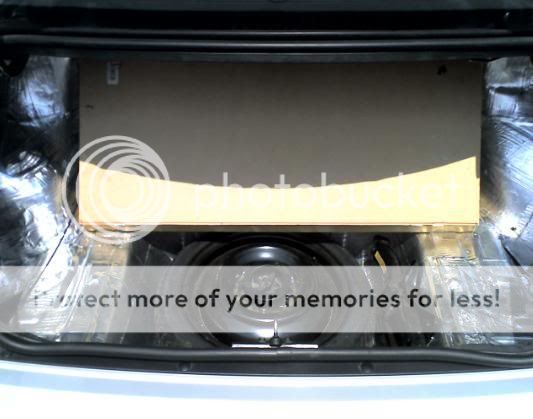


 I cant get any pictures of the carpeted project yet as my car is in the shop. Funny story - It was a rainy day and i missed a curve and drifted into a curb with my wheels turned, so i flew up on over the curb and went driving on a sidewalk. So I went and changed my tire, and opened my trunk, and the first thing i said to myself was "boy am i glad i built a door for my spare tire". Too bad i damaged my engine cradle/subframe and sway bar as well. Ugh.
 Printable version


